

In ‘NieR:Automata Ver1.1a’ episode 3 titled ‘break ti[M]e,’ 2B and 9S go to the resistance camp after helping its members escape unhurt from a vulnerable situation. At the camp, 2B and 9S get along with the workers quite well but it is a complete different case with Lily. She strangely appears to be suspicious of 2B for some reason and this puzzles 9S, who ends up asking her about it. Sometime later Jackass accompanied by 9S and 2B head to a desert where several machine lifeforms sightings have been reported. As they dig deeper, 2B and 9S begin to stumble upon some very uncomfortable truths.
2B and 9S Visit the Resistance Camp
After 9S and 2B rescue the resistance members, they accompany them to their base. Outside they come across one of the parts of the Goliath machine lifeform. They get a warm welcome there and seem to get along well with the workers. That’s when one of them asks 9S about the back that he is carrying on his back. Interestingly, he does not give a direct answer and claims that it is a secret.
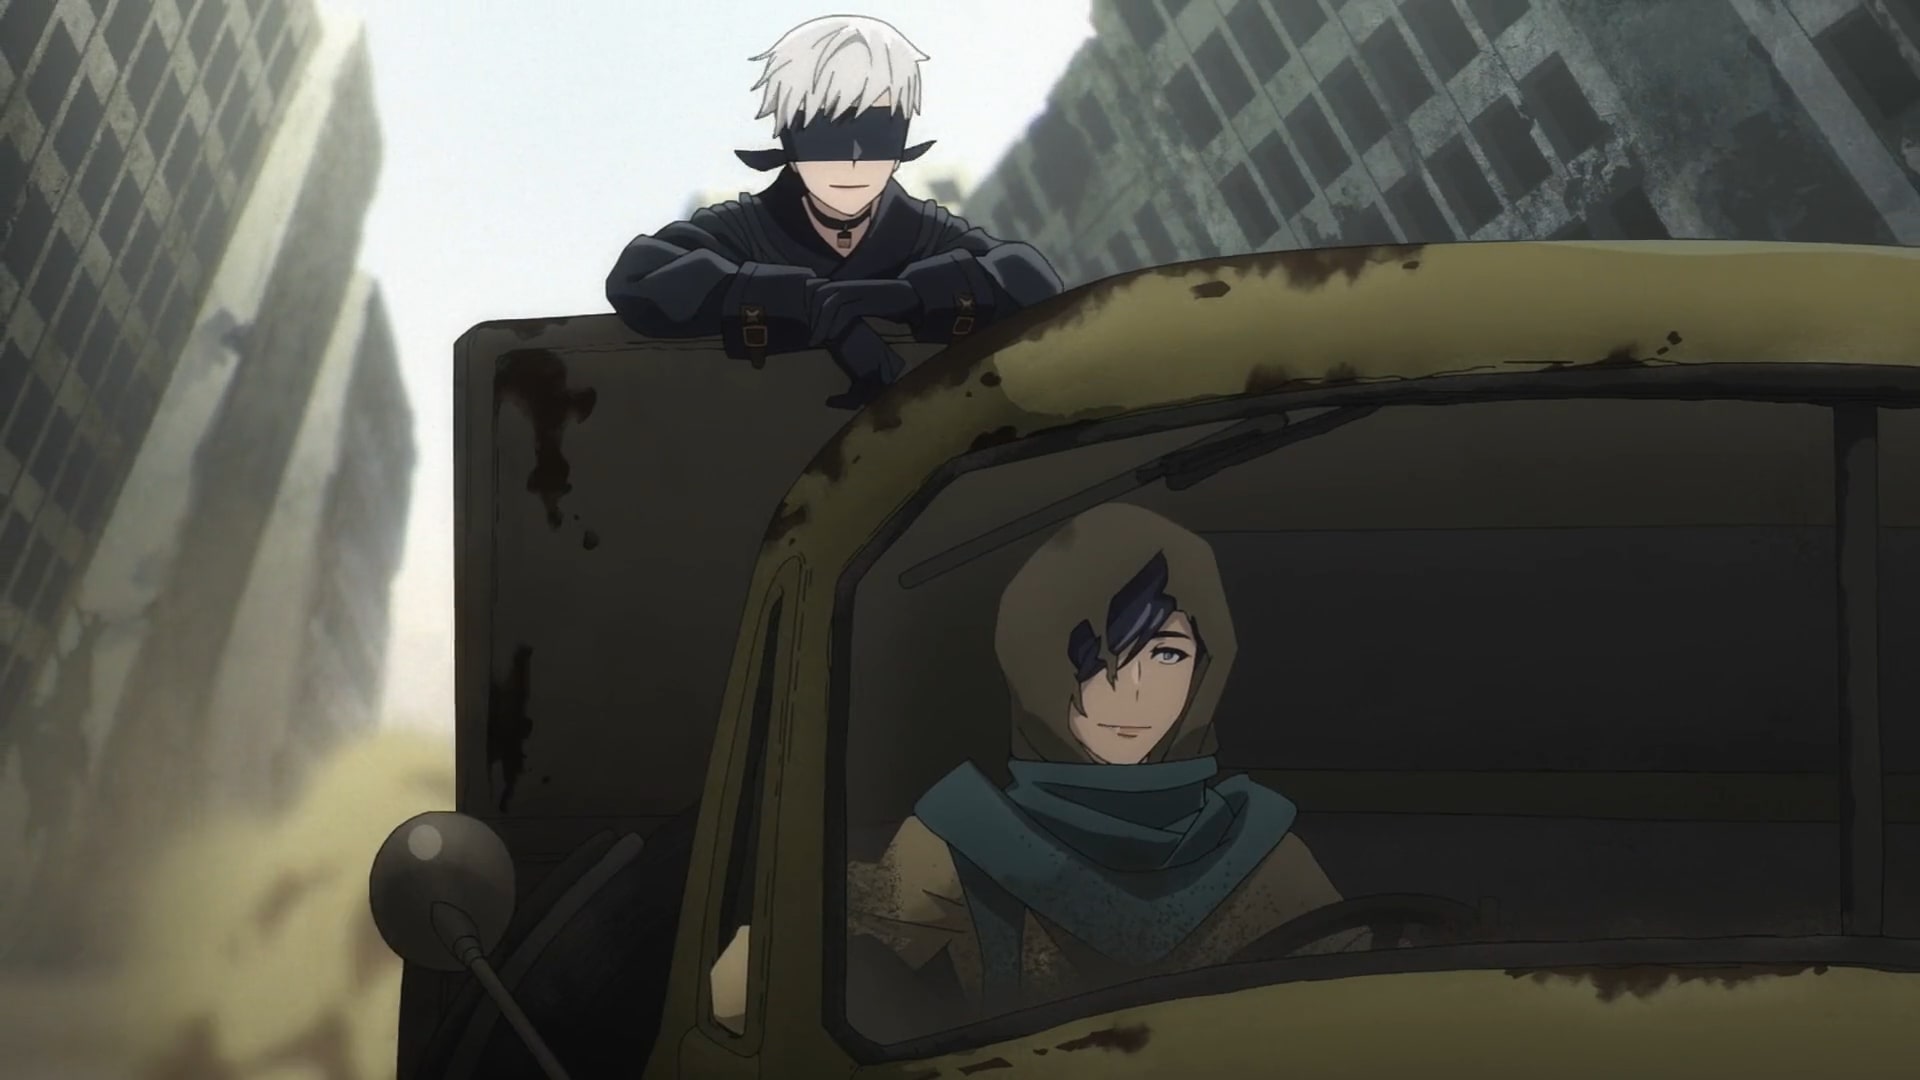
Later, the duo meets Lily who appears suspicious of 2B for some reason. 9S notices this and even asks if she knows her, but before he could answer Lily is interrupted by Jackass. 9S and 2B then accompany Jackass to a mission in the desert where they are supposed to investigate multiple machine lifeform sightings. In the meantime, Commander White finally reveals the real reasons for sending 9S and 2B to help the resistance.
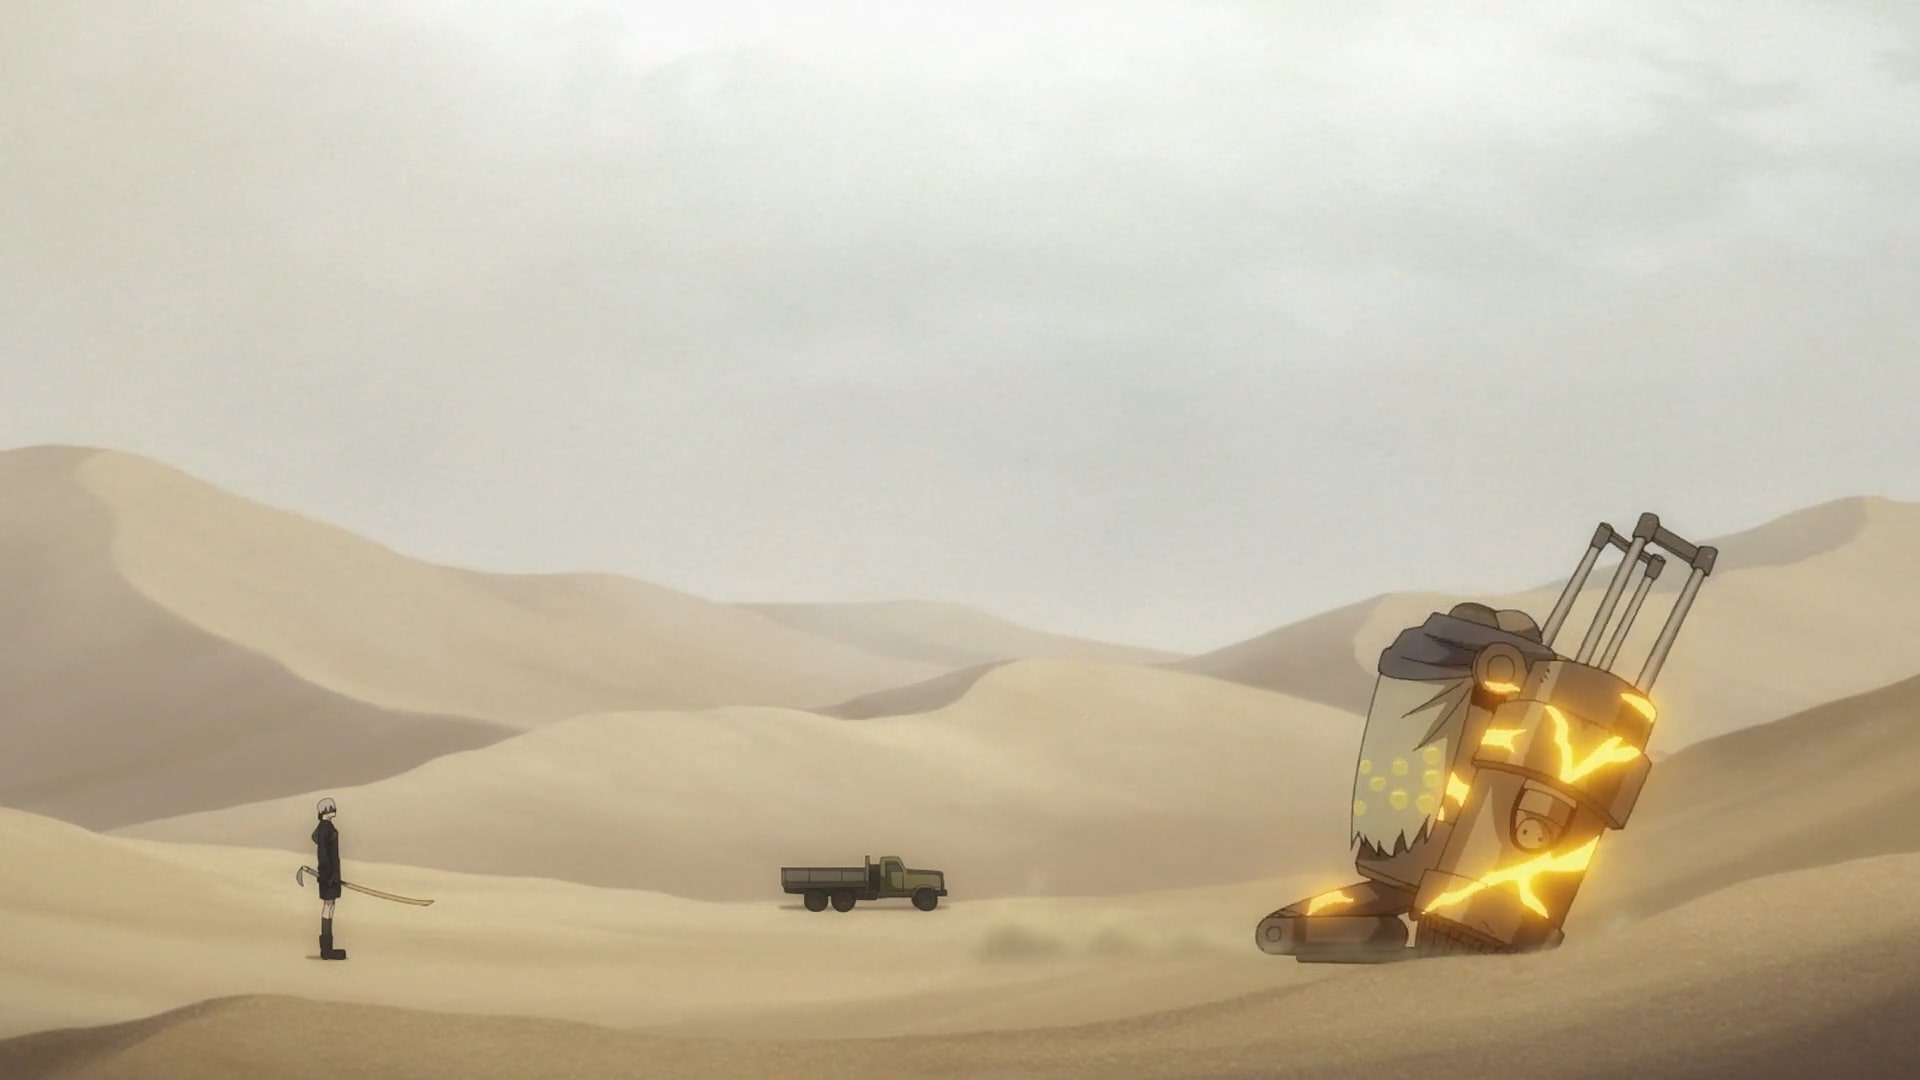
It turns out that assistance requests did not motivate her to send them but instead the desire to use the resistance as a decoy was the main factor. Commander White feels that it is impossible to fulfill every assistance request since it can cause hindrances in other operations. In the desert, 2B and 9S accidentally come across a machine lifeform. Although 9S manages to hack it, he witnesses a strange ceremony that shakes him to the core.
Have the Machine Lifeforms Evolved?
After 9S witnesses the strange ceremony after managing to hack the machine lifeform that he and his comrades encounter in the desert, he is at a loss for words to describe what he is witnessing. Luckily, 2B manages to destroy it before it could potentially hurt someone on their team. But just moments later two much smaller machine lifeforms emerge from underground but appear to rethink their decision to confront their enemies.
They show signs of panic, which is strange considering they should not have feelings, before running away. 9S, 2B, and Jackass reach an abandoned human housing complex while trying to catch them. Interestingly, some unidentified radio disturbances cause communication problems in the region. They soon end up at a place where they find bodies of countless androids along with machine lifeforms. The place appears to be a graveyard of machine lifeforms and suddenly 9S notices an inexplicable reaction from underground.
As the land under their legs begins to sink, they end up in a strange underground dungeon-like place where they find small machine lifeforms strangely imitating human emotions. 9S feels that he cannot allow things to go on like this and decides to destroy each machine lifeform there. However, the hostile reaction leads to a strange chain of events in which the machine lifeforms rush toward a central body that is spherical in shape. Eventually, it opens up and a machine lifeform appearing almost human-like appears out of it. 2B and 9S are quick to attack it.

Interestingly, it bleeds just like a normal human being after it is attacked and falls helplessly to the ground. But another similar-looking machine lifeform emerges from the corpse and unleashes a brutal attack following which 2B and 9S appear to contemplate retreating. In the previous episode, there were machine lifeforms who appeared to have gained feelings and again viewers can see them almost mimicking human emotions as well as their looks. Therefore, it can be said without a shadow of a doubt that machine lifeforms are evolving now.
Read More: NieR:Automata Ver1.1a Episode 2 Recap and Ending, Explained